


Music Mixing Checklist PROS Use Before EVERY Release
Quick summary
Think your mix is finished? Before you hit export, professional mixing and mastering engineers use a critical checklist to ensure their music sounds great everywhere.
I’ll share the EXACT steps I use, covering reference tracks, tonal balance, LUFS loudness, and mono compatibility, so you can release your music with confidence.
What’s In This Article
- Why a Final Mix Checklist is Essential for Home Studio Owners
- The Pro Mixing Engineer’s Pre-Export Checklist
- 1. Compare Your Mix to Professional Reference Tracks
- 2. Visually Analyze Tonal Balance and Dynamics
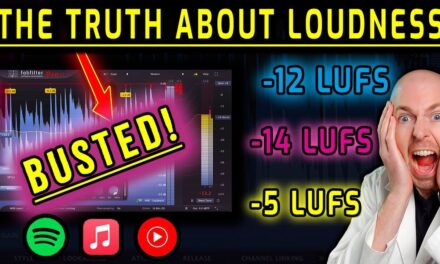
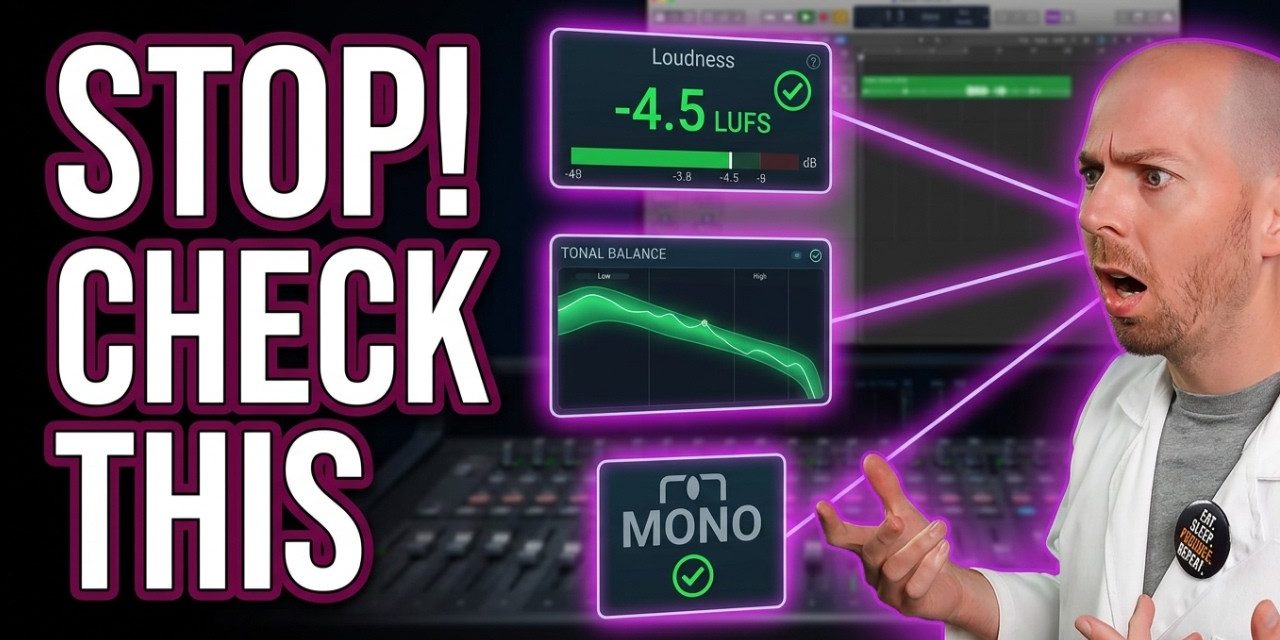
- 3. Verify Overall Loudness with an LUFS Meter
- 4. Perform a Critical Mono Compatibility Test
- Wrapping Up: Release Your Music with Confidence
Key moments in the video
- 0:00 — Introduction: Why a Checklist?
- 0:24 — The Most Important Check: Reference Tracks
- 1:04 — Using Metric AB for Referencing
- 3:24 — What to Listen For When Referencing
- 3:51 — Visual Tonal Balance Check with iZotope
- 5:07 — Comparing Dynamic Range
- 6:44 — Verifying Loudness with LUFS
- 8:27 — Bonus Check: Mono Compatibility
- 10:13 — Key Takeaways & Recap
Enjoying the Video?
Get more home-studio tutorials, mixing breakdowns, and gear deep-dives every week.
So, you’ve put in the hours, tweaked every knob, and you’re convinced your latest track is finally done. But before you hit that export button, how can you be absolutely sure your mix is truly ready to shine on any playback system?
The truth is, even after countless hours, our ears can play tricks on us. That’s why professional mixing and mastering engineers rely on a crucial final mix checklist before releasing any song.
This isn’t about perfection, but about catching common pitfalls and ensuring your music sounds consistently great.
I’m going to walk you through the exact practical checklist I use every single time to confidently release music, covering essential steps like comparing against reference tracks, analyzing tonal balance, verifying loudness, and performing a vital mono compatibility check.
These checks are simple, effective, and will give you the confidence to share your hard work with the world.

Why a Final Mix Checklist is Essential for Home Studio Owners
As home studio owners, we spend countless hours with our music making it easy for ear fatigue to set in. Our perception can become skewed, making it difficult to objectively assess if a mix is truly balanced and ready for the world.
This is where a systematic pre-export checklist becomes invaluable. It provides an objective framework, helping you catch common mistakes and ensuring your hard work translates consistently across the many playback systems your audience will use, from high-fidelity headphones to mono Bluetooth speakers.
The Pro Mixing Engineer’s Pre-Export Checklist
Professional mixers and mastering engineers don’t just guess when a track is finished, they follow a specific set of checks to ensure quality and competitiveness.
Here are the three core things I do every single time before I export my music, plus a crucial bonus step.
1. Compare Your Mix to Professional Reference Tracks
The first, and arguably most important, step is to compare your finished mix to professional reference tracks.
These are songs in the same genre that you know sound amazing on every system. This helps you gauge if your mix is at a competitive volume and sounds great across various playback environments.
- Set Your Limiter Output: Before you start, make sure your final limiter on the master bus is set to a competitive loudness. I recommend an output of -0.2 dBFS (decibels full scale) for this test.
- Load Your References: You can use a dedicated referencing plugin like Adaptr Metric AB, which allows you to easily switch between your mix and multiple reference tracks. Alternatively, simply drag and drop competitive songs from your genre into your DAW and solo them as you switch back and forth.
- What to Listen For: As you quickly switch between your mix and the reference tracks, pay close attention to:
- Overall Volume: Is your track roughly as loud as the references, or significantly quieter/louder?
- Stereo Width: Does your mix feel as wide or as focused as the professional tracks?
- General Tonal Balance: Does the overall frequency balance (low-end, mid-range, high-end) feel similar? Do you notice any ‘holes’ in certain frequency areas, or is any part too bright or too dull?
- Element Balance: Listen for individual elements. Does the snare feel too loud, or the vocal too quiet, compared to how they sit in the reference tracks?
The goal isn’t to perfectly match your mix to the reference tonally. Instead, you’re looking for anything that sounds ‘weird’ or ‘off’ when you switch. If something jumps out, you know you need to revisit either the mix or the master.
2. Visually Analyze Tonal Balance and Dynamics
Sometimes, after hours of mixing, our ears can start to fatigue. This is where a visual tool can provide a fantastic secondary ‘gut check.’ I personally use iZotope Tonal Balance Control for this.
- Create Spectral Profiles: This tool allows you to create a spectral profile of your reference tracks. You can load multiple professional songs to build a generalized target curve for your genre.
- Visualize Frequency Balance: As your song plays, Tonal Balance Control displays its frequency spectrum. If your mix’s curve falls roughly in line with the shape of your reference profiles, you know that tonally, it’s very similar to competitive tracks.
- Compare Dynamic Range: The plugin also offers a visualization of your mix’s compression and dynamic range (crest factor) compared to your references. If the indicator is in the middle, your dynamics are similar. If it shifts right, you have a smaller crest factor (less dynamic range). If it shifts left, your mix is more dynamic than the references.
Don’t worry if there are small ‘holes’ in the spectral display during certain parts of your song. Often, these areas are meant to be filled by other elements that come in later, like vocals. This tool is excellent for confirming what your ears are telling you, especially when fatigue sets in.
3. Verify Overall Loudness with an LUFS Meter
While listening comparisons are crucial, it’s also good practice to objectively check your integrated LUFS (Loudness Units Full Scale) on your output bus. This ensures your levels are competitive with other songs in your genre, preparing your music for streaming platforms.
- Measure Integrated LUFS: Use an LUFS meter (like FabFilter Pro-L2, which includes a meter) on your master output to get an average loudness reading for your entire track.
- Compare to References: Note the integrated LUFS of your reference tracks. For example, some extremely loud tracks might hit -5.3 LUFS or -6.2 LUFS. Your goal is to be in a similar ballpark.
- Identify Issues: If your mix is several LUFS away from your reference tracks (e.g., -15 LUFS when references are -6 LUFS), something is likely wrong in your output stage or the mix itself.
Important Warning: Don’t Just Crush Your Mix! If your LUFS number is far off, this doesn’t mean you should simply slam your mix into a limiter until the numbers match. That’s not how it works.
A significant difference indicates an underlying issue in your mix that’s preventing it from achieving its maximum loudness potential. Not all songs can be as loud as your favorite tracks; arrangement and instrumentation play a huge role in how much loudness a song can achieve.
Aim to be within about 3 LUFS of your favorite songs, but always prioritize sound quality over a number.
4. Perform a Critical Mono Compatibility Test
Even in an age of stereo earbuds, checking your mix in mono is still a non-negotiable step for pros. Many playback systems, like some cheap Bluetooth speakers or club sound systems, will sum your stereo mix to mono. If your mix falls apart in mono, it will sound terrible on these systems.
- How to Check: Most DAWs have a simple ‘downmix to mono’ option on the master bus. If you have an audio interface like the RME UFX, it might have a dedicated mono button. Simply click the button or enable the option to switch your monitoring from stereo to mono.
- What to Listen For: In mono, listen for any weird phase cancellation, dropouts in instruments, or elements that suddenly disappear or become too prominent. Ensure everything still sounds reasonable and balanced.
- The Benefit: If your mix sounds good in mono, it’s almost guaranteed to sound good everywhere else it’s played. It’s a testament to a solid mix free of problematic phase issues.
Wrapping Up: Release Your Music with Confidence
Before you hit that final export button, make these checks a standard part of your workflow. By consistently comparing your mix to references, using visual analysis tools, verifying loudness, and ensuring mono compatibility, you’ll not only improve your mixes but also gain the confidence to release your music knowing it will sound great wherever it’s played.
If you’re looking to dive deeper into the ‘dark art’ of mastering and get your songs sounding as loud and competitive as possible, especially for rock and metal genres, check out my Conquer The Master Bus Home Studio Mastering Course. I’ve got a coupon code in the description to help you out. And if you make rock or metal music, don’t forget to grab my FREE downloadable cheat sheet for mixing tips!
Links to Plugins Shown in the Video
Some links above are affiliate links — using them supports the channel at no extra cost to you.
Key takeaways
- Always reference your mix against professional tracks to ensure competitive volume, tonal balance, and element placement.
- Use visual tools like iZotope Tonal Balance Control as a secondary gut check, especially when ear fatigue sets in, to confirm frequency balance and dynamic range.
- Verify your overall loudness using an integrated LUFS meter to ensure your track is competitive within its genre, but avoid simply crushing your mix to hit a target number.
- Perform a critical mono compatibility test to check for phase issues and ensure your mix translates well across all playback systems, including those that sum to mono.
Frequently asked questions
Why is a final mix checklist important for home studio owners?
A final mix checklist helps combat ear fatigue and provides an objective framework to ensure your music sounds consistent and competitive across all playback systems. It helps catch common mistakes before release.
How do I use reference tracks effectively?
Load professional tracks in your genre into your DAW (or a plugin like Metric AB) and quickly switch between them and your mix. Listen for differences in overall volume, stereo width, tonal balance, and the balance of individual elements like vocals and drums. The goal isn’t perfect replication, but identifying anything that sounds ‘off’.
What is LUFS and why is it important?
LUFS (Loudness Units Full Scale) is a standard for measuring perceived loudness. Checking your integrated LUFS ensures your track is competitively loud within its genre for streaming platforms. However, don’t just ‘crush’ your mix to hit a number; a significant difference in LUFS often points to underlying issues in the mix itself.
Why do I still need to check my mix in mono?
Many playback systems, such as some Bluetooth speakers or club PAs, sum stereo audio to mono. Checking your mix in mono helps identify phase cancellation issues or elements that disappear or sound strange, ensuring your music translates well on all systems.
What if my mix doesn’t perfectly match my reference tracks?
It’s okay if your mix doesn’t perfectly match. The goal of referencing is to identify major discrepancies or anything that sounds ‘weird’ or unbalanced compared to professional tracks. If something feels significantly off, it indicates an area you might need to revisit in your mix or master.
Want to see the whole walkthrough? Watch the full video on YouTube.


